


Views: 0 Author: Site Editor Publish Time: 2026-10-07 Origin: Site


Excessive dross on plasma-cut parts frustrates fabricators worldwide on a daily basis. It turns a quick cutting job into a labor-intensive grind. You expect clean, ready-to-weld edges. Instead, you get thick slag welding itself directly to your workpiece. This buildup is not just an ugly aesthetic issue for your shop. It creates costly secondary operations like heavy grinding and mechanical chipping. These extra manual steps drastically slow down your production pipelines. They also severely compromise subsequent welding quality if left untreated.
We will explore exactly why this happens and how you can fix it permanently. You will learn a systematic, evidence-based diagnostic framework today. We will help you identify specific dross types accurately. You will also discover how to troubleshoot your machine settings properly. Finally, we will show you exactly when to evaluate consumable replacement or upgrade.
Dross characteristics (high-speed vs. low-speed) are the primary indicators of your baseline parameter errors.
Even with perfect settings, a worn out plasma nozzle will cause arc divergence and heavy dross buildup.
Visual inspection of the nozzle orifice (checking for out-of-roundness) is the most reliable metric for replacement.
Selecting the right precision plasma nozzle and a consistent supplier directly impacts the scalability and profitability of your fabrication runs.
Operators must first learn to read the slag left on their parts. Dross acts as a direct physical record of your cutting parameters. You can identify the exact machine error by simply looking at the edge. We divide these formations into three main categories. Each category points to a different mechanical failure.
Low-speed dross appears frequently during thick plate cutting operations. You will see thick, bubbly, and globular accumulations on the bottom edge. These hard masses fuse deeply into the base metal. They are notoriously difficult to chip off manually.
The mechanism behind this is straightforward. The torch moves too slowly across the plate. The plasma arc constantly searches for more material to melt. This action artificially widens the kerf. It melts significantly more metal than the assist gas can blow away. The excess molten steel pools at the bottom and solidifies into hard globules.
High-speed dross looks entirely different. You will notice thin, stringy slag closely attached to the bottom edge. This formation usually accompanies a trailing lag line angle. You can see these tilted striations on the cut face.
This happens because the torch outpaces the cutting arc. The arc trails backward continuously. Consequently, the gas stream lacks the vertical downward force required. It fails to eject the molten metal before it solidifies. The slag rolls over the bottom edge and clings tightly.
Top dross sits entirely on the upper surface of the plate. We often refer to this as spatter. You usually cause this by piercing too close to the material. Cutting too fast can also trigger top spatter. The arc fails to penetrate the plate fully. This forces the molten metal to spray upward. It lands on the surface rather than dropping down through the kerf.
Table 1: Dross Diagnostic Characteristics and Solutions
Dross Type | Visual Markers | Root Cause | Immediate Action |
|---|---|---|---|
Low-Speed | Thick, bubbly globules; hard to chip. | Torch moving too slow; arc searching for metal. | Increase cutting speed by 5% increments. |
High-Speed | Thin, stringy; tilted cut face striations. | Torch moving too fast; arc trailing backward. | Decrease cutting speed; check gas pressure. |
Top Dross | Splatter on top surface of the plate. | Improper pierce height; incomplete penetration. | Increase standoff distance; check pierce delay. |
Always adjust cutting speeds in small increments of five percent.
Verify your air pressure at the machine, not just at the compressor.
Keep a log of optimal settings for different material thicknesses.
The cutting process relies entirely on fluid dynamics and extreme heat. The plasma torch nozzle acts as the final critical choke point. It funnels heavily ionized gas into a tight, confined space. This creates a perfectly cylindrical, high-velocity jet. This jet slices through thick steel effortlessly.
Consumables degrade naturally over time due to extreme thermal stress. The divergence problem begins the moment the orifice degrades. The arc expands outward instantly. It loses its strict, powerful cylindrical shape. A divergent arc wastes energy rapidly. It deposits intense heat into the sidewalls of the kerf. It stops focusing kinetic energy downward. This loss of focus directly causes severe dross buildup.
This divergence impacts secondary manufacturing operations heavily. It creates far more than just messy dross. It introduces heavy edge hardening on materials like carbon steel. Industry professionals call this phenomenon nitriding. A divergent arc pumps nitrogen into the freshly cut edge. This creates a brittle, hardened outer layer.
You must mechanically grind this nitrided layer away. If you skip this crucial step, severe problems arise. Subsequent MIG welding operations will likely fail. The weld pool will develop excessive porosity. The joint may even crack under normal structural stress. Replacing consumables early prevents this massive hidden labor cost.
Mixing old electrodes with new nozzles, causing premature failure.
Ignoring moisture in the air lines, which rapidly destroys orifice geometry.
Overtightening the retaining cap, which disrupts internal gas swirl patterns.
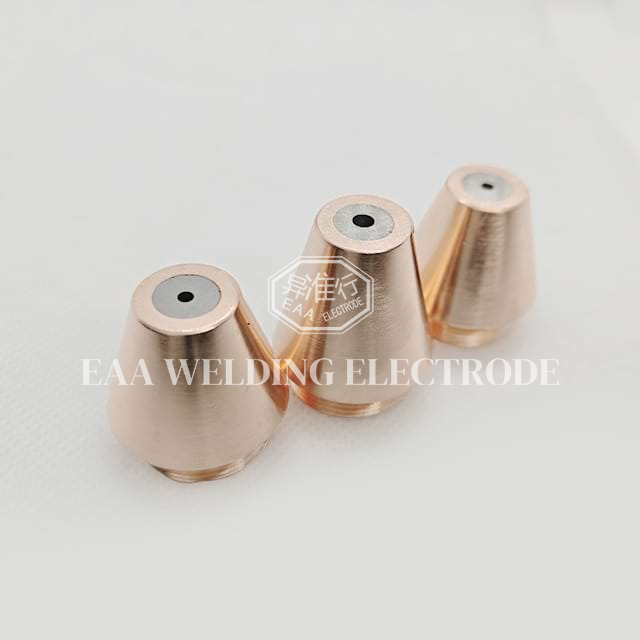
Premature replacement hurts your overall shop profitability. However, cutting with ruined parts costs even more. Do not discard consumables based on arbitrary cut-time estimates. You should base replacement decisions on actual physical evidence. Monitor your cut quality degradation closely.
You must perform the out-of-round test regularly. First, remove the plasma cutting nozzle from the torch assembly. Inspect the main orifice carefully. Use a jeweler's loupe or a magnifying glass. You are looking for perfect geometric symmetry.
If the hole looks oval, you have a major problem. Gouged or asymmetrical holes are completely ruined. The arc will become highly directional. It will create irregular dross on specific sides of the cut. You must replace it immediately. Continuing to cut guarantees rejected parts.
Next, check for interior pitting and abnormal wear. Look closely inside the component. You might see heavy hafnium blow-back. Improper pierce heights usually cause this specific damage. Plunging too close to the plate forces molten metal upward. It pits the delicate interior copper surfaces permanently.
Follow a strict symptom checklist before discarding parts. Run test cuts on scrap material first.
Adjust your cutting speed up or down by five percent.
Tweak your arc voltage slightly to adjust torch height.
Verify your air supply is completely dry and clean.
Observe the bottom edge of the test cut.
If these parameter adjustments yield no reduction in dross, stop cutting. The component is structurally compromised. Install a new Plasma Nozzle. Always keep spares handy at your workstation.
Shops often debate the value of standard versus precision consumables. Standard nozzles prioritize maximum longevity above all else. They work exceptionally well for rough structural cuts. They handle thick steel framing efficiently. However, fine-feature cutting requires better tools entirely.
A precision plasma nozzle changes the operational game. It features exceptionally tight machining tolerances. This engineering delivers near-laser edge quality. It minimizes kerf width drastically. It allows for sharp corners and intricate nested geometries.
Material considerations dictate your consumable choice heavily. Processing delicate thin sheet metal is notoriously tricky. You need a precision orifice for this task. You must use lower amperage settings overall. This minimizes the heat-affected zone (HAZ) effectively. A smaller heat zone prevents sheet warping. It also reduces hard-to-remove micro-dross significantly.
Heavy plate fabrication requires realistic expectations. Cutting thicker materials inherently produces some dross. Think about processing thick half-inch steel plate. You cannot achieve a completely dross-free edge through plasma alone. However, a precision component minimizes this buildup effectively.
It transforms what would be welded slag into a light flake. You can chip this flake off easily. A simple hand scraper usually does the job. You avoid the need for heavy grinding wheels. This saves hours of strenuous manual labor.
Finding a reliable plasma nozzle supplier matters immensely for your operation. Consistency is your most important metric here. Production environments demand highly predictable performance daily.
Consumable variance from batch to batch causes chaos. It ruins carefully automated CNC nesting parameters. You end up reprogramming machines constantly to compensate. This destroys your production schedule.
Use specific evaluation criteria for your vendors. You must demand transparency and quality.
Machining Tolerances: Do they provide verifiable data on orifice concentricity? Demand proof of their engineering accuracy.
Material Integrity: Look at the quality of the copper alloy. Check the thermal conductivity ratings. Good materials resist premature melting effectively.
Supply Chain Reliability: Your shop demands will scale up over time. Your vendor must keep pace with volume. They must prevent costly machine downtime by maintaining stock.
Consider the OEM versus aftermarket debate carefully. Look at your actual profitability metrics per run. High-quality aftermarket suppliers often offer excellent value. They can match OEM specifications perfectly in many cases.
However, their quality assurance must be transparent. Ask about their internal testing protocols. Reputable vendors will share this information gladly. They understand that edge quality dictates your success. Avoid the cheapest options on the market. They usually feature poor copper grades. They will melt prematurely and ruin your workpieces.
Eliminating excessive dross requires a methodical, evidence-based approach. It is rarely a single isolated failure. You must combine visual diagnostics with mechanical maintenance.
Read the Dross: Always identify the dross type (high vs. low speed) first. Adjust your CNC speed and voltage parameters accordingly.
Inspect Physically: If parameter tweaks fail, pull the torch apart. Physically inspect the orifice for out-of-roundness using a loupe.
Demand Precision: Treat your consumables as precision instruments, not generic hardware. Invest in high-quality replacements.
Protect Profitability: Upgrading your consumable quality drastically reduces secondary grinding labor. This directly improves your overall part profitability and turnaround time.
A: Thick plates require optimal pierce height and delay. If piercing too close, molten blowback instantly damages the new nozzle. This causes immediate heavy dross on the rest of the cut. Ensure your CNC table uses proper standoff distance. Follow manufacturer charts for pierce delay times carefully.
A: No. The internal geometry and orifice edge sharpness dictate arc flow. Drilling alters the diameter and creates micro-burrs. This guarantees poor cut quality and potentially damages the torch head. Precision gas flow relies on perfectly round edges. Always discard damaged consumables rather than modifying them.
A: Avoid heavy angle grinders. They warp thin materials quickly. Use chemical pickling or pneumatic needle scalers at low pressure. You can also use specialized slag-removal tumbling machines. These methods preserve the geometry of intricate cuts. Hand scrapers also work well for very light micro-dross.


